Both PoE and wifi IP cameras end up doing the same job — recording and transmitting video over a network — but the installation process, the cabling involved, and what can go wrong differ meaningfully between the two. Understanding both setups before choosing avoids picking based on which sounds simpler, only to run into the other format’s specific installation challenges partway through.
The Core Difference Before Installation Even Starts
A PoE (Power over Ethernet) camera receives both power and data through a single ethernet cable connected to a PoE switch or NVR. A wifi camera receives data wirelessly but still needs a separate power source — either a mains adapter plugged into a nearby socket, or an internal battery recharged periodically. This single distinction shapes almost everything about how each installation actually unfolds.
Installing a PoE Camera: Step by Step
Plan the cable route first. Before mounting anything, map out how an ethernet cable will travel from the camera’s intended position back to the PoE switch or NVR, accounting for walls, ceilings, or outdoor runs along a wall or eave. Unlike wifi, there’s no flexibility to reposition after installation without re-running cable, so this planning step matters more upfront.
Run and terminate the cable. Route the ethernet cable along the planned path, securing it with clips or conduit where it runs externally, and terminate both ends with the correct connector, typically RJ45, crimped or punched down correctly at both the camera and switch ends. For outdoor runs, use cable rated for outdoor exposure rather than standard indoor-rated cable, which degrades faster under sun and moisture.
Connect to a PoE switch or NVR. Plug the camera end into the mounting point and the other end into an available port on the PoE switch or NVR’s built-in PoE ports, if it has them. The camera should power on automatically once connected, with no separate power cable needed.
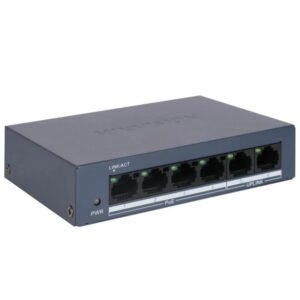
Mount the camera and adjust the angle. With power and data already flowing through the single cable, mounting is now just a matter of physically securing the bracket and adjusting the camera’s angle to the desired field of view.
Configure on the network. Add the camera to the NVR or an app, assign it a channel if applicable, and configure recording settings, motion zones, and any other preferences.
Installing a Wifi Camera: Step by Step
Check wifi signal strength at the exact mounting spot. Before mounting, stand at the intended position with a phone and check actual signal strength there, not just near the router, since walls and distance can weaken a signal considerably over a short span.
Confirm a power source is accessible. For a mains-powered wifi camera, confirm a socket or safely routed extension cable can reach the mounting point. For a battery or solar model, confirm the spot gets reasonable charge retention or sun exposure instead.
Mount the bracket. Secure the camera bracket to the wall or ceiling at the planned position, checking it sits level before fully tightening.
Connect power. Attach the power adapter, or install the charged battery, and confirm the camera powers on.
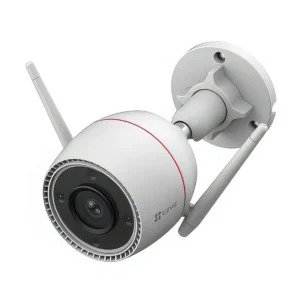
Pair with the app. Install the manufacturer’s app, create an account, and follow the pairing steps — typically scanning a QR code or using an audio pairing tone to join the camera to your 2.4 GHz Wi-Fi network. A model like the EZVIZ H3c Wi-Fi Smart Home Camera follows this standard pairing flow, connecting entirely through the app once powered on, with no cabling beyond the power connection itself.
Adjust the angle and test the connection. With the live feed visible in the app, fine-tune the camera’s angle, and test the connection from outside the home network to confirm remote viewing works reliably before considering the installation complete.
Cabling Effort: Where the Real Difference Shows Up
This is the most immediate practical difference between the two. PoE installation requires running a physical cable from each camera back to a central switch or NVR, which takes more time, tools, and sometimes wall or ceiling access that a wifi installation avoids entirely. Wireless camera for home use specifically benefit from this simplicity — a homeowner can often install a wifi camera entirely on their own, without drilling beyond the mounting bracket itself, whereas a PoE installation more often benefits from a proper cable-running job done carefully, particularly for a longer outdoor run.
Power Reliability: Where PoE Tends to Win
Once installed, a PoE camera’s power comes from the switch, which is typically backed by the same power supply as the rest of a wired network — easier to protect with a single UPS covering the switch and router together. A wifi camera depends on its own local power source, meaning a mains-powered wifi camera still needs protection at its own socket during an outage, and a battery camera depends entirely on its charge level, independent of household power but requiring its own maintenance routine.
For a property with frequent load shedding, a PoE setup centralizes backup power planning to one point — the switch and NVR — rather than needing to think about each wifi camera’s power situation individually.
Signal and Connectivity Reliability
A PoE camera’s data connection runs over a physical cable, which doesn’t degrade with distance or walls the way wifi does, making it inherently more stable once properly installed — no signal strength to monitor, no interference from other devices on a crowded 2.4GHz band. A wifi camera’s reliability depends on signal strength at its specific mounting point, which can change over time as new devices join the network or as walls and furniture shift, something a PoE camera simply doesn’t need to account for.
For mounting points at the edge of a property — a far gate, a boundary wall — where wifi signal is often weakest, this reliability gap tends to matter most and is frequently the deciding factor in choosing PoE over wifi for that specific position.
Scalability: Adding More Cameras Later
Adding a camera to a PoE system means running a new cable to the new position and connecting it to a switch with an available port, which is straightforward if the switch has spare capacity. Adding a wifi camera is simpler in one sense — no cable to run — but depends on the local wifi network comfortably supporting another device without degrading performance for cameras already connected, something that becomes a genuine constraint once several wireless cameras share the same busy network.
Cost Comparison Between the Two Approaches
IP camera price in Pakistan for comparable wifi and PoE models sits in a broadly similar range, so the real cost difference between the two setups usually comes from installation rather than the camera itself. PoE installation requires cable, connectors, and a PoE switch if one isn’t already in place, adding materials and labor cost upfront. Wifi installation avoids most of that but may need a wifi extender or improved router placement to achieve reliable coverage at outdoor or distant mounting points, which carries its own cost if signal strength turns out to be inadequate.
Which Setup Fits Which Situation
A property already running, or planning, a multi-camera network with a central NVR generally benefits from PoE’s cable-based reliability, particularly for permanent mounting points like gates, entrances, and boundary walls. A rented property, a single or small camera count, or a situation needing quick, flexible installation without drilling or cable runs tends to favor wifi, accepting the trade-off of ongoing signal strength dependency in exchange for installation simplicity.
Choosing Based on the Actual Installation, Not a General Preference
Neither PoE nor wifi is universally the better choice — the right one depends on how many cameras are planned, how permanent the installation is, and whether a reliable wifi signal genuinely reaches each intended mounting point. A small, flexible wifi setup serves a home or rental well where simplicity matters most. A larger, more permanent system with several cameras at fixed outdoor positions generally benefits from PoE’s added installation effort in exchange for the reliability it delivers once properly cabled in.