Radon is an invisible and odorless radioactive gas that naturally forms from the breakdown of uranium in soil and rock. It can seep into homes through foundation cracks, crawl spaces, and other openings. Since radon cannot be seen, smelled, or tasted, many homeowners remain unaware of its presence until they perform a radon test.
When elevated radon levels are discovered, homeowners often search for affordable ways to solve the problem. One common solution people consider is a diy radon removal service. The idea of saving money while improving indoor air quality is appealing, but the question remains: Is it truly effective and safe?
This article explores how a diy radon removal service works, its advantages, disadvantages, common mistakes, and when hiring professionals is the better choice.
What Is a DIY Radon Removal Service?
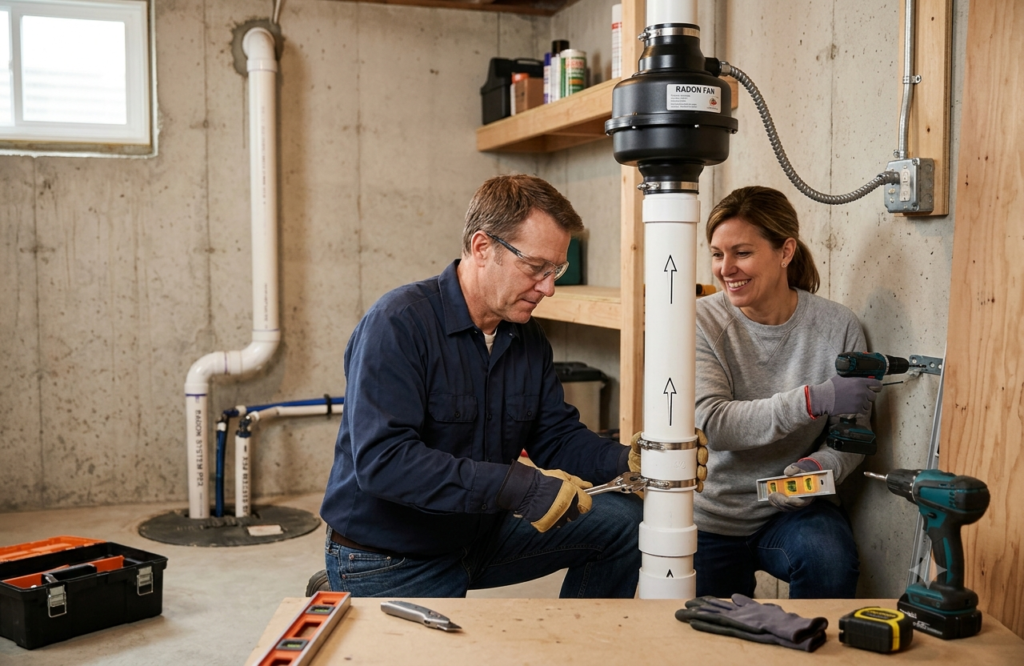
A diy radon removal service refers to installing a radon mitigation system without hiring a licensed radon mitigation contractor. Instead of paying for professional installation, homeowners purchase the necessary equipment and install the system themselves.
A typical DIY radon mitigation project may include:
- PVC vent pipes
- Radon mitigation fan
- Pipe fittings
- Roof flashing
- Sealants
- Pressure gauge
- Electrical wiring for the fan
The objective is to collect radon gas from beneath the foundation and safely vent it above the roofline before it enters the living space.
How Does Radon Enter Your Home?
Understanding how radon enters your home helps explain why mitigation systems must be installed correctly.
Common entry points include:
- Cracks in concrete floors
- Foundation joints
- Utility pipe openings
- Floor drains
- Crawl spaces
- Sump pits
- Gaps around service pipes
Because radon follows the path of least resistance, even tiny openings can allow significant amounts of gas into your home.
How a DIY Radon Removal Service Works
Most homeowners who choose a diy radon removal service build what is called an active soil depressurization system.
The process generally involves:
Step 1: Locate the Suction Point
A hole is drilled through the basement slab or crawl space floor.
Step 2: Create a Collection Area
Small amounts of soil are removed beneath the slab to create a suction pit.
Step 3: Install PVC Pipe
PVC piping connects the suction pit to the exterior vent system.
Step 4: Install the Radon Fan
A specialized fan continuously draws radon gas from beneath the foundation.
Step 5: Vent Above the Roof
The gas is discharged safely above the roof where it disperses into the atmosphere.
Step 6: Test Again
A follow-up radon test verifies whether radon levels have dropped below recommended limits.
Benefits of a DIY Radon Removal Service
Many homeowners choose DIY because of several potential advantages.
Lower Installation Costs
Professional radon mitigation can be expensive. A DIY installation usually costs much less because labor expenses are eliminated.
Learning Opportunity
For homeowners experienced in plumbing, electrical work, and home improvement, installing a radon system can be an educational project.
Flexible Schedule
DIY projects allow homeowners to complete the work at their own pace without waiting for contractor availability.
Personal Satisfaction
Successfully installing a functioning radon mitigation system can provide a sense of accomplishment.
Risks of Choosing a DIY Radon Removal Service
Although the lower cost is attractive, there are several important risks.
Incorrect System Design
Every home has different soil conditions, foundation layouts, and airflow characteristics. A poorly designed system may fail to reduce radon effectively.
Improper Fan Selection
Using the wrong fan can reduce system performance or increase energy consumption.
Poor Pipe Placement
Incorrect pipe routing may create airflow restrictions that reduce suction beneath the foundation.
Roof Venting Errors
Improper vent placement may allow radon gas to re-enter windows, attic spaces, or ventilation systems.
Electrical Hazards
Installing radon fans requires safe electrical connections. Mistakes can create fire or shock hazards.
Lack of Warranty
Professional installations often include warranties. DIY systems generally do not.
Common DIY Mistakes
Many homeowners underestimate the complexity of radon mitigation.
Common mistakes include:
- Using regular ventilation fans instead of certified radon fans
- Failing to seal foundation openings
- Installing undersized piping
- Venting below roof level
- Ignoring building codes
- Skipping post-installation testing
- Choosing the wrong suction location
Even small errors can significantly reduce system effectiveness.
When a DIY Radon Removal Service May Be Suitable
A diy radon removal service may work under certain conditions.
It may be appropriate if:
- The home has a simple basement layout.
- Radon levels are only moderately elevated.
- The homeowner has advanced construction experience.
- Local building regulations permit DIY installation.
- Proper testing equipment is available.
Even in these situations, careful planning and post-installation testing remain essential.
When Professional Radon Mitigation Is the Better Option
Professional installation is generally recommended when:
- Radon levels are extremely high.
- The home has multiple foundation types.
- Crawl spaces are involved.
- Complex slab construction exists.
- Previous mitigation attempts failed.
- Local regulations require certified installers.
Professionals have specialized diagnostic equipment that helps determine the most effective suction points and fan sizes.
How Much Can You Save?
Cost is often the biggest motivation behind choosing a diy radon removal service.
Typical DIY expenses may include:
| Item | Estimated Cost |
|---|---|
| Radon fan | $150–$350 |
| PVC pipe and fittings | $75–$200 |
| Sealants | $20–$50 |
| Pressure gauge | $15–$40 |
| Electrical supplies | $50–$150 |
| Miscellaneous materials | $100–$250 |
Although DIY installation may reduce overall costs, mistakes that require future repairs can eliminate those savings.
Importance of Radon Testing Before and After Installation
Testing is the only way to know whether your mitigation system works.
Recommended testing includes:
Before Installation
Measure current radon concentrations using a certified radon test kit or continuous monitor.
After Installation
Retest the home after the mitigation system has operated for several days to confirm reduced radon levels.
Long-Term Monitoring
Experts recommend periodic radon testing every few years or after major renovations to ensure the system continues operating effectively.
Safety Tips for DIY Installation
If you decide to install your own mitigation system, follow these safety practices:
- Wear proper eye and respiratory protection.
- Follow electrical safety procedures.
- Use only radon-rated mitigation fans.
- Seal all slab penetrations carefully.
- Install vent pipes according to local building codes.
- Verify fan operation regularly.
- Always perform follow-up radon testing.
These precautions improve both safety and system performance.
Frequently Asked Questions
Can a DIY radon removal service eliminate all radon?
No. The goal is to reduce radon levels to an acceptable range rather than eliminate every trace of the gas.
Is DIY installation legal?
Regulations vary by location. Some areas allow homeowner installation, while others require licensed contractors.
How long does installation take?
Experienced homeowners may complete installation within one or two days, although planning and testing may require additional time.
How often should a radon system be inspected?
Annual visual inspections and periodic radon testing help ensure continued performance.
Conclusion
Choosing a diy radon removal service can be an affordable solution for homeowners with strong construction skills and a solid understanding of radon mitigation principles. It offers lower upfront costs and greater flexibility, but it also comes with significant responsibilities. Proper system design, safe installation, and thorough post-installation testing are essential for success.
For homes with high radon levels, complicated foundations, or unique structural challenges, professional radon mitigation remains the safest and most reliable option. Whether you choose the DIY route or hire an expert, taking action to reduce radon is an important investment in your family’s long-term health and indoor air quality.