Where live streaming is concerned, no software has received as much popularity and reliance as OBS Studio. Whether you stream on Twitch, YouTube, or Facebook Gaming, being an expert with OBS is the line between a beginner stream and a pro broadcast. From bitrate configurations to audio filters, each minor tweak affects your stream quality and viewers’ experience.
At GreatOverlays, we offer expert stream overlays, alerts, panels, and transitions to enhance your streaming brand. In this tutorial, you’ll learn about the OBS fundamentals that every streamer should master to achieve smooth Twitch and YouTube streams.
1. Configuring OBS Studio
Before you go live, ensure your OBS configuration is ideal:
-
Download OBS Studio’s latest version (official website).
-
Set OBS bitrate based on your internet speed (4500–6000 Kbps for 1080p).
-
Tune OBS resolution (720p for average PCs, 1080p for high-end).
-
Set OBS FPS to 30 or 60 based on system performance.
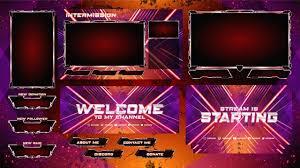
Use this setup with GreatOverlays stream packs for business-grade overlays, alerts, and panels that immediately enhance your channel branding.
2. Master OBS Scenes & Sources
The core of OBS streaming is scenes and sources:
-
OBS scenes: Design gameplay, webcam, intermission, and stream ending layouts.
-
OBS sources: Insert game capture, display capture, webcam, or browser source (for overlays).
-
Group scenes into collections to switch between Twitch and YouTube configurations easily.
Ready-to-use overlay packs from GreatOverlays seamlessly integrate into OBS sources, eliminating hours of design time.
3. Audio Settings & Filters
Sound can ruin or save your stream. With great video, poor sound chases them off. OBS has tools to address this:
-
Noise suppression filter: Eliminates hum from the background.
-
Compressor: Levels out very loud and very quiet sounds.
-
Limiter: Stops audio from peaking and distorting.
-
Adjust OBS audio bitrate (use 160 kbps for streams).
Use OBS filters with a good microphone configuration and GreatOverlays video for a professional stream that cannot be matched.
4. OBS Hotkeys for Stream Control
Hotkeys provide quicker stream control:
-
Switch scenes with a single button.
-
Start/stop streaming or recording rapidly.
-
Turn overlays or alerts on/off live.
-
Enable push-to-talk for controlled commentary.
Professionals leverage OBS hotkeys to maintain smooth streams while remaining game-focused.
5. Overlays, Panels & Alerts
An overlay-less stream is bland. Branding and design make you stand out:
-
OBS overlays: Frame webcam, chat, and gameplay windows.
-
Stream alerts: Celebrate new followers, donations, and subscribers.
-
OBS panels: Display information beneath your Twitch stream.
-
GreatOverlays packs: Offer animated overlays, stinger transitions, and pro panels.
Consistency in branding is important. Utilize overlays and alerts from GreatOverlays to make a consistent identity on Twitch and YouTube.
6. Scene Transitions & Stingers
Smooth scene transitions make everything feel so professional.
-
Utilize default OBS transitions such as fade, swipe, and cut.
-
Step up to stinger transitions for pro effects.
-
Make transition duration less than 1 second to keep the pace.
GreatOverlays provides branded stinger transitions that fit your stream branding perfectly.
7. Recording & Replay Buffer
In addition to streaming, OBS is great for recording gameplay:
-
Record gameplay in high definition with OBS recording settings.
-
Utilize the Replay Buffer to instantaneously record highlight moments.
-
Create YouTube or TikTok content using recorded clips.
Pro streamers optimize growth by repurposing streams into video content.
8. Optimizing Stream Quality & Performance
A lag-free, smooth broadcast keeps viewers happy.
-
Sync OBS resolution & FPS with your hardware specs.
-
Utilize hardware encoders such as NVIDIA NVENC for optimized performance.
-
Test stream beforehand before going live.
-
Watch out for large dropped frames in OBS stats window.
When optimized, pair this setup with GreatOverlays graphics packs for stunning results.
9. Twitch & YouTube Branding
Your branding is the essence of audience trust.
-
Twitch overlays & panels: Get your channel to appear professional.
-
YouTube overlays & alerts: Engage streams with real-time emotions.
-
Use intermission screens (Starting Soon, BRB, Ending) for downtime.
-
Stick to a consistent design style for stream branding.
With GreatOverlays stream packs, you’ll always have branding consistency across multiple platforms.
10. Advanced Stream Control with Plugins
Take your OBS to the next level with plugins:
-
Move transition plugin for smoother animations.
-
OBS StreamFX for advanced visual effects.
-
OBS plugins for countdown timers, filters, and more.
Combine these with GreatOverlays animated overlays to produce a custom and engaging live stream.
FAQs – OBS Studio Basics
Q1: What is the optimal bitrate for OBS streaming?
A bitrate of 4500–6000 Kbps is suitable for 1080p at 60 FPS, depending on the speed of the internet.
Q2: Can I stream on Twitch and YouTube using OBS?
Yes, OBS has support for both. Set up separate scene collections for both sites.
Q3: Do overlays slow OBS?
Not if optimized correctly. Utilize GreatOverlays packs that are performance-friendly and lightweight.
Q4: What do I do to remove laggy OBS streams?
Reduce resolution or FPS, modify bitrate, and implement hardware encoding such as NVENC.
Q5: Do I need OBS plugins?
Not needed, but highly suggested for professional control and custom designs.


