Candy mold trays make it easy to create sweets that look neat and professional. You can use them for chocolate, gummies, or even hard candy. With a few simple tricks, you can make treats that look like they came from a shop. Let’s go step by step and learn how to use candy mold trays the right way.
Step 1: Choose the Right Mold
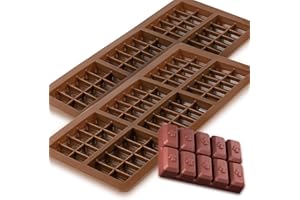
Not all molds are the same. Silicone molds are soft and flexible, which makes it easy to remove candy without breaking it. Plastic molds are firm and give clean edges but can crack if you twist them too hard.
Pick a mold shape that fits your recipe. Simple shapes like hearts or circles are best for beginners.
Step 2: Prepare Your Mold
Before pouring candy into the mold, make sure it’s clean and dry. Even a tiny drop of water can ruin melted chocolate or sugar syrup.
If you’re using plastic molds, you can lightly brush them with a bit of oil to help release the candy later. Silicone molds usually don’t need any oiling.
Step 3: Melt or Mix the Candy
For chocolate, melt small pieces slowly using a double boiler or a microwave in short bursts. Stir after every few seconds so it doesn’t burn.
For sugar candy, heat sugar and corn syrup until it reaches the right temperature, usually around 150°C (300°F). Use a candy thermometer if possible.
If you’re making gummies, melt gelatin with fruit juice on low heat.
Step 4: Pour with Care
Use a small spoon, piping bag, or squeeze bottle to fill each mold cavity. Don’t rush.
Pour slowly to avoid bubbles. Tap the tray gently on the counter after filling to release any trapped air. This makes your candies smooth and even.
Step 5: Let It Set
Cooling is important. For chocolate, let the mold rest at room temperature first, then move it to the fridge. For gummies or hard candies, leave them on a flat surface until fully set.
Avoid freezing candy unless the recipe says so, as sudden cold can make it crack or change texture.
Step 6: Remove Candies Gently
Once your candy has hardened, it’s time to take it out.
Bend the silicone mold slightly to loosen the candy. Push from the bottom and let it pop out.
If you use plastic molds, tap them lightly on the table or flip them over and press carefully.
Step 7: Decorate and Store
Now comes the fun part. You can dust your candies with cocoa powder, drizzle melted chocolate, or add edible glitter.
Once decorated, store them in airtight containers. Keep them cool and dry. Moisture and heat can spoil the texture.
Try Creative Candy Recipes
When you’re ready to try new ideas, explore candy recipes for silicone molds. You can make fruit gummies, mint chocolates, or peanut butter cups. You can even try layered candies—pour one flavor, let it set a little, and then add the next layer.
Silicone molds handle all kinds of recipes well because they are flexible and heat-safe.
Cleaning and Care Tips
Clean your molds soon after use. Wash with warm soapy water and rinse well. Avoid sharp tools that can scratch or tear the mold.
If chocolate leaves a film, wipe it with a soft cloth dipped in warm water. Make sure molds are completely dry before storing.
Common Mistakes to Avoid
- Don’t overfill the cavities. Candy will stick together.
- Don’t pour hot syrup into thin plastic molds; they can melt.
- Don’t put hot molds in the fridge right away; sudden cooling can cause cracks.
- Don’t use too much oil—it can leave greasy marks.
Final Thoughts
Using candy molds isn’t hard once you know the basics. Start with simple shapes, melt your ingredients slowly, and let them cool properly. Soon, you’ll be making perfect little sweets for every occasion.
With the right candy mold trays, a bit of patience, and practice, your homemade treats can look and taste amazing. Whether it’s for parties, gifts, or just fun at home, every candy batch will be a sweet success.