Introduction
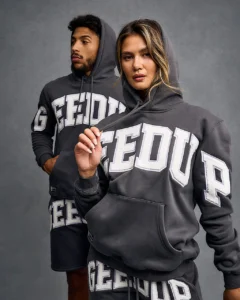
Your logo is the cornerstone of your brand identity. On a website or a business card, it’s flawless. But when you try to translate that perfection onto a garment using your Pfaff embroidery machine, you can hit a wall of frustration. Puckered fabric, blurry edges, and colors that don’t pop are telltale signs of an amateur file. The secret to bridging this gap isn’t a hidden button in your machine; it’s a specialized craft. Learning how to Convert Logos for Pfaff Embroidery Machines—specifically into the PCS format—is what separates hobbyist results from a crisp, professional finish.
This process isn’t just conversion; it’s intelligent translation and textile engineering. This guide unveils that secret, walking you through the mindset and methods that ensure your brand looks its absolute best in thread.
Demystifying the PCS File: Pfaff’s Native Language
First, let’s understand the destination. For many Pfaff embroidery machines (particularly the industrially-inclined Creative™ and icon™ series), the PCS file (Pfaff Creative Stitch) is the native, optimized format. It’s more than just a container for your design; it’s a high-level set of instructions tailored to Pfaff’s hardware.
Think of your logo as a beautiful, detailed painting. The PCS file is the comprehensive restoration guide for a master conservator—it doesn’t just say “repaint this area,” it specifies the exact brush strokes, pigment mixtures, and layering techniques to use. Similarly, a PCS file contains:
-
Precision Stitch Data: The coordinates and types of stitches, optimized for Pfaff’s drive system.
-
Machine-Specific Commands: Instructions that leverage Pfaff’s unique features, like its Integrated Dual Feed or precise thread trimming.
-
Structured Sequencing: The optimal order of operations for clean color changes and minimal jumps.
You can’t rename a JPG to .pcs and expect magic. The logo must be re-engineered into this language, a process called digitizing. The “secret” is in how this digitizing is done.
The Hidden Mindset: You Are a Textile Engineer, Not Just a Translator
The biggest mistake is approaching this as a simple file conversion. A professional doesn’t just change the format; they re-imagine the design for a new, three-dimensional medium.
When you Convert Logos for Pfaff Embroidery Machines, you must adopt an engineering mindset:
-
Fabric is Your First Consideration: Will this logo go on a stiff cap, a stretchy polo, or a plush towel? Each fabric behaves wildly differently under the needle. The digitizing strategy changes for each.
-
Thread is Your Paint, With Limitations: You can’t replicate a 6-color gradient with perfect fidelity. A professional simplifies and uses stitch direction to create visual depth where color blends can’t.
-
Structure is Invisible but Essential: Like the steel frame inside a building, underlay stitches are hidden but fundamental. They prevent puckering and make top stitches look crisp. Amateurs skip this; professionals build with it.
The Step-by-Step Secret Sauce: Professional Digitizing Workflow
Here’s the behind-the-scenes process a professional uses to create a flawless PCS file from your logo.
Phase 1: Forensic Logo Preparation
Professionals always start with the best possible source material.
-
Demand the Vector File: The #1 secret weapon is a vector logo (.AI, .EPS, .SVG). This provides mathematically perfect paths, ensuring razor-sharp edges at any size. If you only have a JPG, the first step is often to re-vectorize it in software like Adobe Illustrator.
-
Simplify with Intent: They audit the logo for “unstitchable” elements: lines thinner than 1mm, fonts under 0.25 inches, subtle gradients. They then make strategic decisions—boldening lines, simplifying color palettes—to adapt the logo for embroidery without losing its core identity.
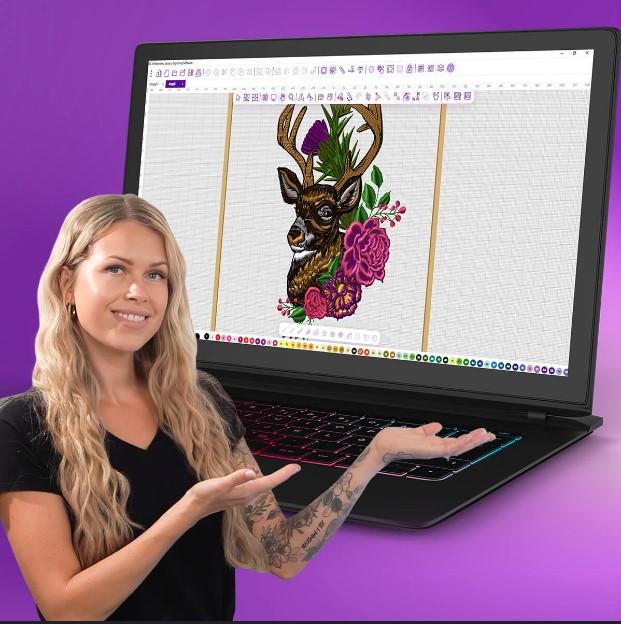
Phase 2: Strategic Digitizing Decisions
This is where the engineering happens within the software (like Pfaff’s own Creative Designer or industry-standard Wilcom).
-
Underlay Application: This is the most critical, non-negotiable step. For every element, they add a foundation:
-
For fill areas, a cross-hatch or zig-zag underlay stabilizes the fabric.
-
For satin columns (borders/text), a center-run or edge-run underlay creates a raised bed for the top stitch to sit on, giving it a plump, professional profile.
-
-
Stitch Type & Pathing: They assign stitch types based on function:
-
Satin Stitch: Used for borders and lettering. They control the width precisely to match the logo’s lines.
-
Fill Stitch: Used for solid areas. They vary the stitch angle in different sections to add visual texture and prevent the fabric from pulling in one direction.
-
Pull Compensation: They digitally enlarge shapes by 0.1mm-0.3mm. This counters the natural pull of the thread, so circles sew as circles, not ovals.
-
-
Efficiency Sequencing: They structure the stitch order to minimize machine stops. All elements of the same color are grouped together, even if they’re on opposite sides of the design, to reduce thread changes and trims.
Phase 3: Validation & Testing
A pro never sends a file blind.
-
Virtual Simulation: They use the software’s 3D simulation to inspect the design from all angles, checking for gaps, density issues, or registration errors.
-
Physical Proof: The ultimate test is stitching the PCS file on a scrap of the exact final fabric. They analyze the stitch-out for puckering, tension, and clarity. The file is then tweaked based on this real-world feedback.
Your Toolkit: Paths to a Professional PCS File
You have several routes to access this professional process.
1. Pfaff Creative Designer Software
This is the official, integrated software for Pfaff machines. It’s a powerful tool that speaks the machine’s language natively.
-
Pros: Guaranteed compatibility, access to exclusive Pfaff fonts and features, direct export to PCS.
-
Cons: A significant investment with a learning curve.
-
Best For: Dedicated Pfaff users committed to in-house, high-volume digitizing.
2. Professional Digitizing Services (The Recommended Secret)
For most businesses, this is the smartest, most reliable path.
-
How it Works: You send your vector logo to an expert on a platform like Etsy, Fiverr, or a dedicated digitizing website. You specify: “Need a PCS file for a Pfaff, final size 3″, for a heavy cotton twill cap.”
-
Why it’s the Secret: You’re not paying for software; you’re paying for expertise. You get a file engineered by someone who makes these decisions every day. They handle the underlay, compensation, and optimization, delivering a production-ready PCS file.
-
What to Look For: Choose a service with a portfolio of clear stitch-out photos (not just digital previews) and positive reviews.
3. Industry-Standard Software (Wilcom/Hatch)
Wilcom EmbroideryStudio is the global professional standard. Hatch is its more user-friendly sibling.
-
Pros: Unmatched control and precision. The ability to create perfect files for any machine, including Pfaff.
-
Cons: High cost and complexity for Wilcom; Hatch is more accessible but still an investment.
-
Best For: Those who digitize constantly for clients or need to output to many different machine brands.
What to Provide Your Digitizer for Best Results
To get a pro result, be a pro client. Send a complete brief:
-
Vector Artwork: The .AI, .EPS, or .SVG file.
-
Exact Dimensions: The desired width/height in inches or millimeters.
-
Fabric Details: “Heavyweight Cotton,” “Performance Polyester,” “Structured Cap.”
-
Any Specific Thread Brand: If you use Madeira or Isacord.
-
Visual Mockup: A simple sketch or note indicating placement.
Conclusion: Mastering the Translation
The secret to professional embroidery is finally out. It doesn’t reside in your Pfaff machine alone, but in the quality of the instructions you give it. To Convert Logos for Pfaff Embroidery Machines successfully is to master the translation from flat graphic to structured stitch blueprint.
For the vast majority of businesses and serious hobbyists, the most effective and efficient path is to partner with a professional digitizing service. This leverages specialized expertise to ensure your PCS file is engineered with the necessary underlay, compensation, and fabric-specific optimization that your brand deserves.
By understanding and respecting this process—valuing the vector source, insisting on structural integrity, and always testing—you elevate your work from homemade to high-quality. Your Pfaff is a precision instrument; feed it a professionally crafted PCS file, and it will produce embroidery worthy of your logo.