


Syna international Clothing is extra than only a keep;...
Fear Of God Essentials Hoodies have emerge as greater...
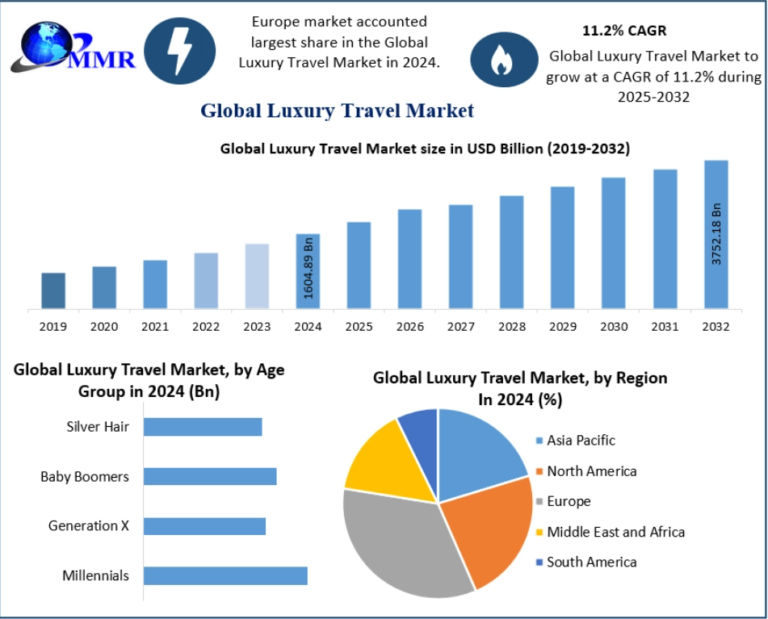
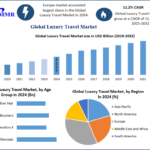
Luxury Travel Market Overview The Luxury Travel Market Research Report extensively examines strategy,...

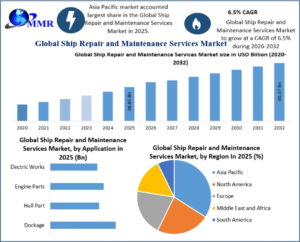
Ship Repair and Maintenance Services Market Overview The Ship Repair and...

Flowers are one of the most loved gifts for...

Pizza boxes are one of the most common food packaging products...